Friday, 28 June 2013

Christmas at Dreamees HQ

Good morning,

It's feeling a lot like Christmas now at Dreamees - we're all ready for the release of our new stamps, CD & paper packs tonight!

Here's what's coming at 9pm - sign up for the Dreamees Newsletter for an email as soon as they're available!


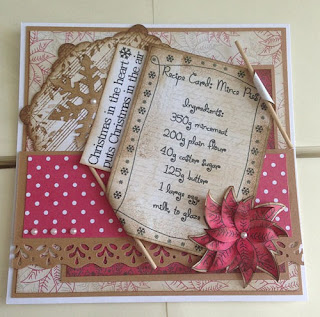
Also, here are a few cards I've been meaning to blog for a while now - they're all Christmas and I absolutely love every one of them!


The above card has been made with the Christmas Essentials CD - just £5.00! The CD has lots of gorgeous recipe cards, poinsettia shapes, backing papers, sentiments, accessories and so much more! It's been designed for use with our latest Christmas stamp range.


This card uses our Berry Tree (Just £2.50) and our Circle Sentiments for Christmas (£3.00) - papers are from Christmas Essentials, Purple Crispy lace/ribbon is available at the Dreamees store, so are the 25mm Flowers & the 10mm Flowers, and the beaded trim.
I absolutely LOVE this card 'cause it's not typically Christmassy and it includes two almost opposite colours that I wouldn't normally put together.


This stamp is officially my FAVOURITE!! It's stunning and it embosses beautifully (the above and below card are both embossed) - It's also great for watercolouring! Papers on the above card are from Christmas Essentials, the poinsettia's in the bottom corner were made using Flower Shapes 1 and the gorgeous Spotty net ribbon is available from the Dreamees store.


This card was made using Silver WOW! embossing powder for the tree - lots of Rock Candy glitter was added, along with black glitter as baubles. The papers are from Christmas Essentials and the snowflake is a Dreamees die-cut (this has been embossed too) and then the sentiment 'O Christmas Tree' comes with the tree too (All for just £3.00!!!).


On this one, I stamped the tree in Gathered Twigs Distress Ink and used a water brush to colour the tree. It looks GORGEOUS. I added some gold glitter and some Rock Candy. Papers are part of a Paper pack we're releasing tonight too! And again, my favourite Christmas circle sentiments have been used!

This tree is one of my favourites too (typically, I LOVE them all!!) I used a pot full of pink gems to cover all the berries on the tree, my favourite Circle Sentiments, Lace, Black beaded trim, Pearl sprays, 50mm flowers and 10mm flowers.
To fill in the tree, I dotted green promarkers all!

This one is so traditional - when I made it I didn't really like it that much but it got so many comments and likes on facebook that it gave me a little bit of confidence!
I stamped the image onto a circular spellbinders die, coloured in using browns & reds then distressed the edges. Papers are part of an upcoming paper pack, striped ribbon is in our store and so are the white 10mm flowers.


This card was made to show off the Distressed Sheet Music stamp - I LOVE IT!! It's very similar in terms of usage to our Script stamp. I also used the snowflake from the Wreath stamp set to make a background. The Bare Tree has been used and a poinsettia made with Flower Shapes 1 too! Sentiment comes in the Bare Trees stamp set.


And again, I love teal - these aren't traditional Christmas colours but I do love this card. To make the scene, I stamped the two trees and joined them, creating small snow mounds, with a light gray promarker. 

Hope you love this long blog post - I've been meaning to do it for a week now!!

Have a lovely weekend, we're off to Swadlincote on Saturday and Sunderland on Sunday - busy, busy, busy (It's great!)


Monday, 17 June 2013

A Top hat!

Hello!

Today I've been having a play with a variation on our Hat template:


This template is from our newest CD Templates & More for just £9.99 - all of the CD's templates come with full instructions and the projects you make can be sold for profit as many times as you like!

To make my template bigger, I simply made a bigger strip for the depth of the hat - I also intend to increase the size of the hat stand for it to sit on!

Ok, so I decided to give a Male project a go with a few of my favourite stamps: Script, Cogs and Pocket Watch/Compass - all paper embellishments are printed from the CD rom.


I used a Hinge clip  with my calendar and circled the date I wanted (It's of no relevance what-so-ever), there are just a few pearls around the edge, some pegs from Wilko's and then my ultimate favourite: a Wishbone! (I finally got around to using one!)


I've used the distress ink pad Gathered Twigs and this was used to stamp Script all over the base cream paper, covering my original template.  The word band says 'live the life you've imagine' which is sold at the Dreamees shop as part of a gorgeous set! 
The little sprockets are also a Tim Holtz Idea-ology product and I finally plucked up the courage to use a couple too!
The mustache, bingo ticket and butterfly are all printed for the CD and distressed using Gathered Twigs.


I used the compass stamp here, punched it out with a 1 1/4" circle punch and then punched a brown circle from 1 3/8" punch to layer up. Cogs are stamped on cream paper and distressed, the chinese coins are just a part of a woodware set we got ages ago!


Above is a gorgeous frame made from a Martha Stewart mould - you can get it from our DT lady Kitty's online store at My Mum's Craft Shop - the clay is super easy to use and dries like polystyrene! I've just inked it with a piece of cut & dry then used a damp paint brush to get into the nooks!

I also used a trinket pin that says Treasure on it, hanging a small key from it.


The playing cards & speech bubble has been printed form the CD and distressed with Gathered Twigs.


My gorgeous pocket watch has been stamped onto cream paper, inked around the edge with Gathered Twigs distress ink and a piece of chain (off an old necklace) threaded through the top. 

The bow has been made using Crinkle Ribbon, dabbed with Walnut Stain distress paint and Tarnished Brass distress stain, screwed up and then dried with a heat tool. It was un-crinkled and tied into a bow!


I really hope you love this as much as I do - I got to use my ultimate favorite colour for this project and it's a great spin on a really girly project!

Have a lovely week!

Hayley xxx


Sunday, 16 June 2013

GIMP Resizing tutorial

Hello!

As promised, here's my as-simple-as-possible GIMP tutorial for resizing. I used this technique (though I used Coral Paint Shop Pro to resize) to create a triple sized heart box from our CD Rom Templates & More

Here's the original box:


And here's my large box (though it doesn't look the size it is!)


Ok, so if you haven't already got GIMP you can download it for free HERE - it's called an image manipulation program so the possibilities are endless. It's just a matter of playing around and seeing how things work!

Open the program and you'll get a screen the contains 3 boxes - if you press the maximize button (the middle button in the top right corner) of the largest box, your screen will look like this:


I'm going to use a simple square to resize - something to give you a rough idea of how to do it.
Open the file by going to 'File, Open' in the top left corner.


First of all, we want to resize this image. To do that, go to 'Image, Scale Image' in the top left corner and a box will pop up - enter the dimensions 3500 x 4951 (this is completely up to you, depending on how large you'd like the image to be). If, like me, you have a jam-packed memory on your computer, a box will pop up asking if you want to scale the image this large - click 'Scale' and the size will change.

Once resized, we're going to use the 'Cut' tool to remove the square onto a small document at it's larger size. The cut tool is 3rd along on the top row of tools - it looks like this:


Next, left click on the document and draw around the piece you'd like to remove - mine is a square:


Right click in the area that you've just drawn and click 'Edit, Copy'


This will copy the square - now we're going to create an A4 document to paste the enlarged image onto. To do this, go to 'File, New' and set the size to 2480 x 3508 (this is a 300dpi A4 sheet)


Once the new, blank document opens, right click anywhere on the sheet and click 'Edit, Paste' - this will paste the enlarged image in the centre of the sheet:


You can then print your resized image by going to 'File, Print' and a box will pop up allowing you to choose the printer.

PLEASE remember to enlarge all pieces of a template in order to keep it in proportion - to make the heart box big I changed the size of the lid and base, keeping them in proportion meaning they fit together perfectly, as the small version does.

Hope that makes sense and if there's anything else I can help with do let me know & I'll try my best!

Have fun playing!

Hayley xx


Monday, 10 June 2013

Sunflower Quick & Easy Makes

Hello to our lovely readers, Kitty here and today i thought i would share a couple of super simple cards that i made for one of the latest Dreamees Demos at My Mums Craft Shop. I wanted to show beginners that you can create a card using just the cd's and infact you can create them using just a backing paper. These are of course fun and fast to create but also handy to have ready if you miss an event!
Both these cards were made using the Dreamees Bloomin' Brights CD. All that was added was a bit of black card, rhinestones/pearls, ribbon and a cabochon. All the sentiment, shapes and papers are all from the Sunflower section of the cd - so it all coordinates.

Kitty xx