Good Afternoon!
So today (well, for the first time in ages!) I thought I'd share a little tutorial with you. This is the second of the day and the first can be accessed HERE:
http://www.youtube.com/watch?v=tcco7UasE0o&feature=plcp
Now, all you're going to need for this is:
1 x Brown paper bag (we're using our bags - if you make a purchase with us at a show, you'll get one of these!)
Large Flower (2) Stamp
Flower (2) Stamp
Small Flower (2) Stamp
Christmas Background Stamp
Winter Wishes Stamp Set - Sentiment
Baubles Stamp Set - Sentiment
White Card
Pencil
Glue
Walnut Stain Ink Pad
Quickie Glue Pen
Glitter
1, Stamp TWO of each flower size onto your brown paper bag:
2. Cut these out:
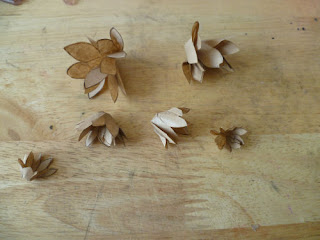
3, Take a pencil and squash each flower over the end of it (NOT the pointy end) - they will screw up slightly as shown:
4, Layer these inside each other with glue:
5, Cut a piece of white card (any size rectangle) and stamp 'Christmas Wishes' round sentiment all over it:
6, Layer this onto brown paper, then again onto white card - cut a strip of brown paper and stamp the repetition stamp 'Christmas Background' all over it as shown:
This is attached across the centre of the card.
7, Stamp 'Warm Winter Wishes' onto brown paper and rip around the edges - attach this across the central border, towards the left of the card.
8, Add your flower to the right edge of the border as shown:
Here is our finished quick card:
Hope you like this!
This is what I was experimenting with yesterday in Birmingham - I find out the best materials to use when I'm reduced to simple necessities! This isn't our usual busy card as I set myself the challenge of doing simple & classy - I LOVE the colour of the paper bags.
Why not try it with candy-striped bags? or vintage flower patterned bags?
Have fun!
Hayley xx


