Saturday 18 December 2010


This is a square card which I decided I wanted to put flowers in between the card. I got the card blank I needed then used the Dreamees stamp set: 'Fiery Flowers' so I knew the size of the gap I needed. Then I cut the card accordingly and stamped/coloured the flowers. I then put the card flat on the workspace and placed the right hand bit of card that I cut off level with the back of the card (To create the original card shape with a strip cut out of it) and glued the flowers on the sides. This will hold the card together and after this I added a bit of backing paper, decoupaged hearts (From the Love Mini CD) and my card was finished!

(Taken from Carols Cards: http://carolscards.wordpress.com/)

Friday 17 December 2010

Christmas Sale, A Sneak Peak at the New CD and a video Tutorial!

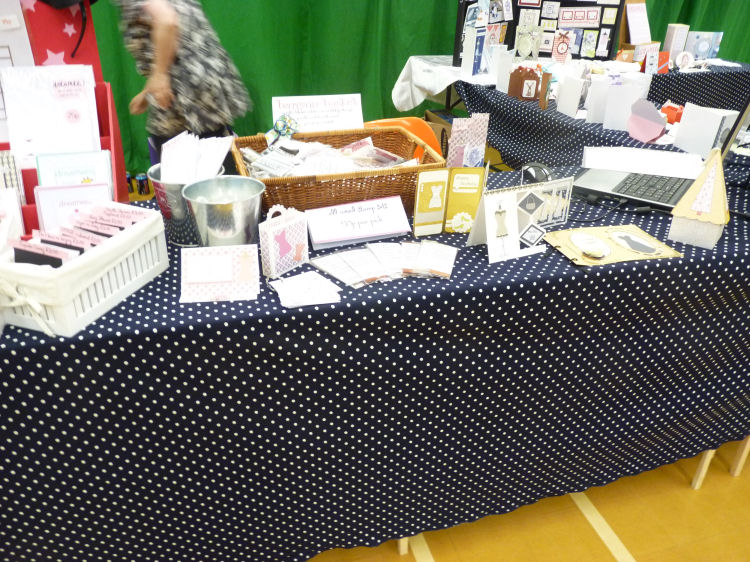
Just thought I'd post a couple of pictures of what's going on at our house this Christmas. 
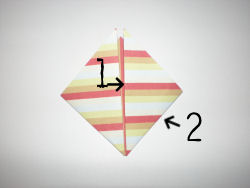
Also, I've been putting together a tutorial that will be slightly lower down in this post!
As you all know, if you're on our mailing list, we've put a sale up on our website. You can find all your crafting needs (well, all your dreamees crafting needs!) at discounted prices, just for christmas! You can visit our website at: www.dreamees.org.uk and get your bargains now!
We do need to stress that we break up on Wednesday the 22nd, although if it's urgent we will obviously attend to your needs. This also means that we will be posting our last parcels on Wednesday, which we hope would reach you by Christmas Eve.
Make sure you get your discounted stamps early as all of them that are discounted will not be returning as an online product next year. You will only be able to get these products in our bargain basket IF we have stock left over.
That means that all the animals, mushrooms, cupcakes, teapots, etc will be retiring as of the 1/1/11.
I hope you don't end up disappointed and urge you to get them while stocks last.

Also, if you order online between now and the 31st of December you will receive a free gift as a thankyou for your purchase and a Christmas wish!

PLEASE NOTE: our online sale finishes at midnight 31st December 2010.


Here is your sneak peak at what's to come on our newest CD (to be released in January 2011)
The CD has 12 month categories and contains all your holiday needs such as mothers day, fathers day, easter, new year, summer holidays, graduation, halloween, christmas and bonfire night! you can't go wrong with this CD that has over 700 printable sheets. These include backing papers, calendars, borders, tags, sentiments, frames, toppers, thankyou notes, place cards, 5 BRAND NEW TEMPLATES and much more! 
Heres just a glimpse at a couple of the toppers! :


And your video tutorial!


YOU CAN SEE MORE VIDEO TUTORIALS AT: www.youtube.com/dreameesTUTORIALS


I apologise for not updating the blog very often. I would blame it on being too busy but that's a bad excuse. I'll try harder in the new year.
Hope you all enjoy your break this christmas! 
Stay safe & Lots of love,
Hayley
xxxxx

Tuesday 9 November 2010


Our upcoming stamp set (The button in the centre of the flowers) is used here! It will be launching this weekend at Hull for a bargain price of £2.00! In the set you get petals to create your own flowers, a stitched petal for decoartion and the button! Absolutely beautiful!
Lots of love,
Hayley!
xxxxx

Monday 4 October 2010

Paper Flowers

I couldn't find the website I used to make these flowers so I decided to write up a tutorial of my own. I don't own the idea, template or fold. There is no copyright infringement intended and I give credit to whoever came up with this idea/fold.


 You will need:
5 squares of paper (I have used 3"x3")
Glue/Adhesive
OPTIONAL: something for the stem (I used a skewer on previous projects)


Instructions:

1) Have the pattern you want on the outside of the flower face DOWN. Fold in half diagonally.


2) Fold the bottom right point up to the point at the top of the triangle.


3) Repeat on the left side.


4) You should then have a shape like this (Two triangles with their longest sides together):


5) Fold out the right hand triangle so that side 1 lays on top of side 2.


6) You should end up with your paper looking like this:


7) Repeat on the left side.


8) You then need to pop open the triangles by placing your finger in the top and flattening.


9) Repeat on the left side.


10) It should end up looking like this:

11) Fold down the tops of the kite shapes you just made (Both sides)

12) Fold those parts in half again.

13) Glue together these sides:

14) Once set, press slightly onto the top of the petal to give it a more rounded shape.

15) Repeat for the other 4 squares (totalling 5 petals)

16) Glue together the sides like so:

17) You then have a flower!

18) If you are using a skewer then you can put some glue on the pointed end and push it gently through the middle of the flower to create a stem.

On this project I stuck flowers onto the sides of the skewers also to create a fuller ornament.

Friday 1 October 2010

Competition Winner!

The winner of the competition is:
Justine Brennan!
Here is her card:


Thankyou to everyone who took part and keep checking back for our next competition and new updates!
xx

Wednesday 29 September 2010


Just a quick post to show you some of the recent projects I've been messing with. Let me know if you want a tutorial for either/both of these.
Lots of love,
Hayley
xxxxx

Sunday 26 September 2010

Quick Project!

Just a quick project (It's pretty well known too I expect) because I'm totally swamped here at the moment and can't seem to find the time to even turn around, haha!
It's just a simple pocket, perfect for putting in a treat on the front of a card!


 You'll probably need to click on  it to enlarge it!

Enjoy,
Lots of love
Hayley
xxxxx

Monday 6 September 2010

Sheffield Show!

We just got back from our first ever show yesterday and wow, what a day! It really was worthwhile and we met some wonderful people there! They all reacted well to the CD's and appreciated the new blood at the shows!
Heres what our stand looked like for it you come see us at other upcoming shows! We're hoping to have a little jig around for future shows to stop us being boring but this was our first set up!:
We didn't even get lost on the way into Sheffield so that was a bonus on top of meeting some lovely crafters and a lovely bartender, haha! Friend for life there!
I promise to be updating this blog more, starting with a couple of projects this week! It's just been crazy busy here but I promise I'll get to it tomorrow!
Lots of love & Keep in touch!
Hayley
xxxxx

Sunday 22 August 2010


Made with the cupcakes on the In a Row CD.


The cupcake strip does come out and is used to be written on.
Velcro is used to make the easel stand up.

Hope you like these,
Hayley
xxxxx

Sonobe Ornaments

This was made with the sonobe fold of origami. It's the most frustrating, unreliable yet beautiful ornament I've ever made. I am overly proud of this, especially after successfully making 3 different sized ornaments. Let me know if you'd like a tutorial.


The mushroom papers have been used (Off of the In a Row CD). I have to say the striped paper (BG24) is my favourite and I can't stop using it. The mushrooms dangling from the bottom are printed on shrink plastic as little charms. I love this ornament & the charms and I hope you like it!
Lots of love,
Hayley
xxxxx

Tuesday 17 August 2010

A paper frame? COOL!

Made this last night so I thought I'd post it! Using the Records sheets on the 'In a Row' CD. Let me know if you'd like it as a project!


Also, working on a vintage CD. Does that sound a good idea? I love how it's turning out but I don't know if it would be to everyone's taste... Let me know if you think it'd be good and you'd use it!
Lots of love,
Hayley
xxxxx

Monday 16 August 2010


Latest addition! :)
This was made with the Male section of the 'In a Row' CD. The records in the lid of the box are bookmarks, obviously for putting down the side of the note pad. Perfect gift for a man who can't remember what he needs from the supermarket or for the side of the phone for notes! :)

This was made saturday night but I didn't post it yesterday as I had a family meal! I do love my family, they really are amazing. I thought I'd post a couple of pictures to show you how I was worn out, haha!


The sensible part of the family sat in the shade or (the men!) inside watching football. Me and Joel (my cousin - through marriage) ended up occupying little miss Faye. haha! It's all fun though. I had such a lovely day in the sun with them two!
Faye didn't know who's birthday we were celebrating though, bless her!
Happy Birthday for last Tuesday Mum! :)


Lots of love,
Hayley
xxxxx